Powered by Blogger.
  • Home
  • Disclaimer
Facebook Instagram Pinterest Twitter Youtube reddit

The Foodie Curls Indian Recipes

Aloo Mutter and Carrot Sabji

Aloo Mutter Carrot Sabji

Quick and simple meals are always welcome in my home and Aloo mutter being one of them. Here I have added carrots too to give it a healthy twist. The sweet taste of mutter and carrots blend amazingly well together. A simple yet delicious North Indian veg recipe made with basic ingredients and spices. Here is how to make aloo matar carrot recipe step by step.

Ingredients for aloo mutter & carrot recipe

1 cup Green peas
1 Big sized Potato
1/2 cup carrot
1 tbsp Oil
1/4th tsp Mustard seed
1/4th tsp Cumin seed
Curry leaves
2 medium sized onion
2 green chilli (optional)
1 Large Tomato
1 tsp coriander powder
1/2 tsp Cumin powder
1/2 tsp Kashmiri red chilli
1/4th tsp Turmeric Powder
Coriander leaves
Kasuri methi(optional)
Salt as per taste

If you feel like watching the video instead click on the play button and enjoy!

Method

  • In a pan heat 1 tbsp Oil.
  • Add mustard seeds and cumin seeds, let it splutter.
  • Next add curry leaves and finely chopped onion, sauté well.
  • Adding green chilli is optional.
  • Now add finely chopped tomatoes, salt, coriander powder, cumin powder, turmeric, red chilli powder and sauté well until oil starts oozing out.
  • At this stage add potatoes and cook for 2 mins.
  • Next add green peas and carrot, sauté them for 2 mins.
  • Add water as per the gravy consistency desired, add salt if required.
  • Cook for 10 mins or until the veggies are well cooked. Cut and check if potatoes are well cooked.
  • Now at this stage add Kasuri methi and coriander leaves. Mix well and cook for a minute.
  • Healthy tasty Aloo mutter with carrot sabji is ready.
  • Serve it with hot phulkas or plain rice.

This recipe is ideal for those who have really pressed for time. Instead of opting for a quick fix by ordering food from outside, you can definitely give this a try. 

Also try Raw Banana Recipe, another easy to make dish.
Share
Tweet
Pin
Share
No comments

Sweetened Condensed milk recipe 

sweetened condensed milk


This Homemade Sweetened Condensed Milk recipe makes a delightful, creamy and smooth condensed milk, just the same which you get ready-made from the store. You can make almost endless things with this one ingredient condense milk or sweetened condensed milk sold under different commercial names such as Milkmaid in India. This one ingredient can be used in making so many different types of dessert dishes; baking Cakes, puddings, Indian sweets/mithai, halwas and the list is never ending.
Although condensed milk is easily available in market these days it is always advisable to make your own version at home and store it for later purpose. The ready made condensed milk comes with preservatives which is not always good for health. And then its so easy to make at home that I simply can’t resist. So, why buy that overpriced canned stuff? When you can make Fresh at home, that too with real natural ingredients. Adding Baking soda is optional however I would suggest to use a pinch of it as it will thicken the condense milk and also keep it stay fresh for longer.
Do try this once and let me know your comments how it turned out.

    You can also watch this recipe video on my YouTube channel:

 Hope you like my recipe, and if you do, please leave a comment, share with your friends, smash the like button and consider Subscribing to my YouTube channel. All of this really helps me keep going! Thank you in advance and hope you enjoy!

Cook time : 40 mins
Serves : Approx 300 ml

Ingredients 

500 ml milk
Sugar 1 cup
Baking soda 1 pinch(optional)

Method 

  1. In a heavy bottom pan, pour in the milk and bring it to boil
    sweetened condensed milk method
  2. Now add sugar and heat it on a low heat until the sugar is dissolved
    sweetened condensed milk method
  3. Once sugar gets dissolved bring the heat on a medium to high flame
  4. Keep stirring regularly and scrap the sides of the pan so as to to get an even consistency
    sweetened condensed milk method
  5. It should take about 20 mins for it to reduce. Milk can froth up and boil over anytime, keep an eye.
  6. We just need to stir this and cook, that's it. Suddenly after 15-17 mins you should see a very vibrant color to it and the texture will be very frothy.
    sweetened condensed milk method
  7. At this stage add the baking soda. Stir well for about 5 mins and let it cool down at room temperature 
    sweetened condensed milk method
  8. It will thicken up once it cools. You can store this condensed milk in an air tight container for around 30 days in refrigerator 
    sweetened condensed milk method

Chocolate sauce/ syrup recipe 

 
Chocolate sauce


This chocolate sauce takes only 10 minutes of cooking time, and it is much better than any store-bought chocolate sauce. Purchased chocolate sauces won't taste the same after you sample this fresh, rich, and very chocolate-dense version.
This syrup is delicious over ice cream or as a base for an intense hot chocolate. Can also be used for baking cakes and fudges. Do try this once and let me know your comments how it turned out.

Preparation time: 5 mins
Cook time: 10 mins

Ingredients

1/4 Cup sugar
1/2 Cup cocoa powder
1/4 Cup sweetened condensed milk
1/2 Cup water

Method 

  1. In a sauce pan or any thick bottom pan take sugar, cocoa powder and water
  2. Mix them well until everything is well combined
    Chocolate sauce method
  3. Cook this mixture on a medium flame 
  4. Once the sugar melts add condensed milk and keep stirring the mixture
    Chocolate sauce method
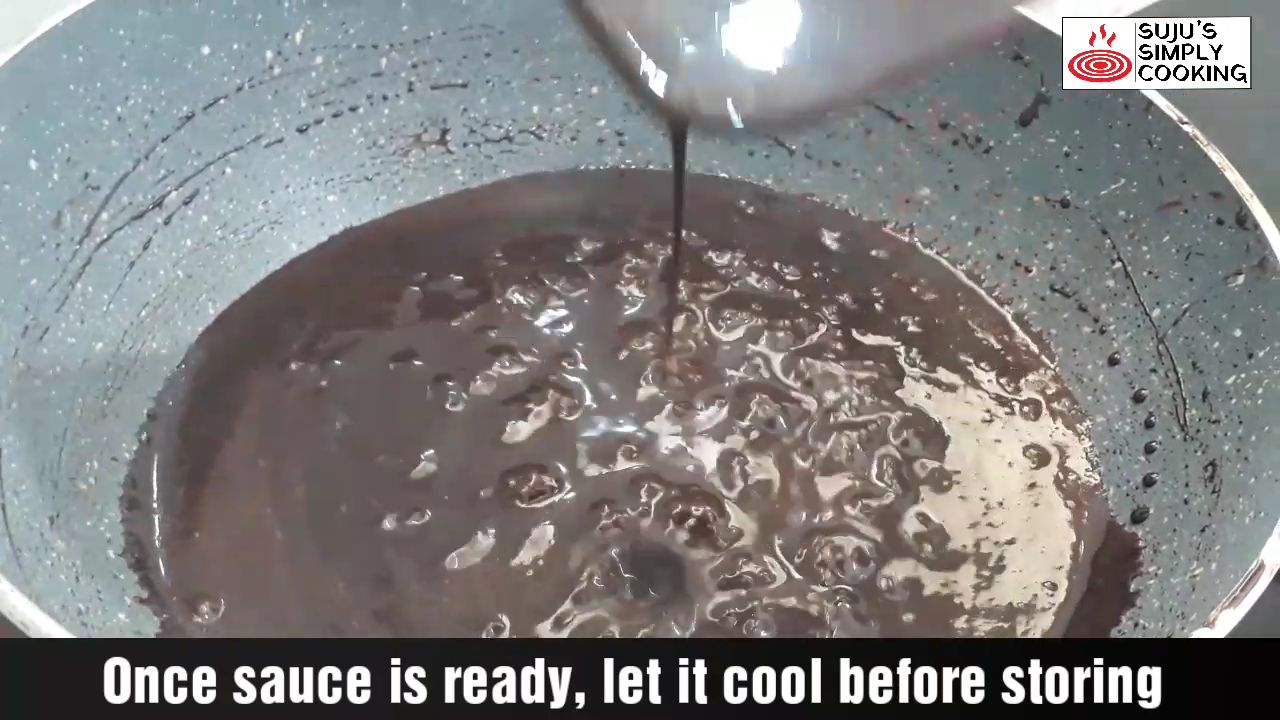
  5. Cook this mixture for about 5 minutes
    Chocolate sauce method
  6. Do not over cook them until sauce is very thick as it thickens once it cools down
    Chocolate sauce method
  7. It can be stored in a air tight container for up to a month in the refrigerator.
    Chocolate sauce method
    Hope you liked my recipe. If you did, please do subscribe to my blog for many more wonderful recipes
    Love, Sujata
---

You can use this recipe to make No Oven Egg-less Chocolate Cake. Click here for recipe 
Share
Tweet
Pin
Share
No comments
Maggie is one of the most preferred food for those pressed for time. Here I am presenting another variation to it for those who are bored of regular one.

Masala Maggie with Onion & Tomatoes:

Masala Maggie
Stove to serve : 10 mins

Ingredients


2 maggie instant Noodles
1 medium onion
1 medium tomato
½ tsp turmeric powder
1 tsp red chili powder
1 tsp ginger garlic paste
1 tbsp cooking oil

Method :

1.     Heat oil in the pan.
2.     Add onion, stir till onion becomes translucent
3.     Now add red chili powder, turmeric powder,salt & ginger garlic paste. Sauté them well for about 5 mins  .
4.     To this add chopped tomatoes. Cook for only 1 min.Make sure tomatoes doesn’t gets mushy.
5.     Pour 2 cups of water to this mixture & get it to a boiling point.
6.     Finally add taste maker & Maggie noodles.
7.     Cover the lid & cook for about 2 mins
8.     Maggie is ready to be served.
Serves 2-3 Pax
Watch the video on YouTube:

Share
Tweet
Pin
Share
No comments

Bored with regular dal, here is a simple yet tasty Dal(Tur) Fry recipe. It is one of the basic and simplest of Indian cuisines. Tur dal / split pigeon peas pressure cooked with onion, tomatoes and spices to tingle your taste buds. Below is the detailed method of making Dal Fry recipe.

Dal Fry Receipe/Split Pigeon Peas

Dal Fry/Lentils
Cooking Time- 25 mins

Ingredients: 

1 cup tur dal/split pigeon peas
2 tbsp ghee/Vegetable oil
1 large chopped onion
1 medium chopped tomato
2 green chili
5 - 6 cloves of garlic
Small piece or half inch ginger
2 Kashmiri red chilli
1 tsp cumin seeds
1 tsp turmeric powder
1 tsp red chilli powder
A pinch asafoetida (hing)
1/2 teaspoon garam masala (optional)
 Coriander leaves
Salt to taste

Method:

1.       Wash & Soak 1 cup tur dal / split pigeon peas in water for around 30 mins
2.       Cook in pressure cooker with 2 cups of water for 3 whistles.
3.       After 3 whistle let it rest for 15 mins until the pressure/steam releases completely
4.       Now open the lid and transfer the dal in a bowl
5.       In a pan take 2 tbsp of ghee/oil , on medium flame once ghee is hot add cumin seeds, dry red chilies, finely chopped ginger garlic,hing & onions. Sauté them for about 3-4 mins until onion turns translucent. Then add finely chopped tomatoes, turmeric powder, red chili powder, salt & green chilies. Mix well for about 2-3 mins.
6.       Finally add the pressure cooked dal , if required can add little water for the consistence
7.       Cook for about 5-6 mins and sprinkle few coriander leaves.
8.       Dal fry is ready to be served

Serving- Can serve 4-5 people.
Garnish with fresh coriander leaves and a dollop of butter to enhance the taste.
Watch the YouTube link below for detailed reference


Share
Tweet
Pin
Share
No comments

A simple and very easy to make chilli garlic cheese toast. All you need is a pan, no toaster or oven or microwave needed. No compromise on taste and crunchiness.

Chilli Cheese Garlic Toast | Crunchy | Homemade
chilli cheese garlic toast
Stove to Serve Time: Approx 15 mins

Ingredients
Sliced Bread
Cheese (Cubes/Bar)
10 cloves Garlic
2 green Chilli
2 tbsp Butter

Method:

1    1.   For sauce take butter in a pan. Once butter is melted add finely chopped green chillies and garlic. Sauté them well.
2.       Once garlic turns light brown in colour off the flame and pour the sauce in a bowl
3.       Now in the same pan add little butter & place two slice of bread. We will toast only one side of the bread
4.       Spread chilli garlic sauce evenly on the toasted side of the bread & grate generous amount of cheese
5.       Finally add some butter on hot pan and place this over it(See video for reference)
6.       Cover the lid for about 2 mins, and your chilli garlic cheese toast is ready to be served.


Serving- Serve hot with any dips and enjoy this crunchy and tasty dish at home. 
Watch the YouTube link below for reference: 


Share
Tweet
Pin
Share
No comments

Sevai/sevaiyya or vermicelli kheer is one of my favourite and most famous Indian dessert.To give it a rich & thick texture I have used Khoya/Mawa/Kawa in this recipe.
This is a very simple & instant recipe anyone can try.

Sevai kheer/Vermicelli/Sevaiyya with Khoya

Sevai Sevaiyya kheer sevaiyyan
Stove to Serve Time: Approx 30mins.

Ingredients:

1 ltr Milk
1 cup vermicelli/ sevai
1 tbsp Ghee
4 tbsp sugar
3-4 cardamom/ ½ tsp cardamom powder
50 gms Khoya/Mawa
Dryfruits (Almond, cashew nuts, pista & Raisin)

Method:

1    1.    Cut dryfruits into thin slices
2.       Crush cardamom or can use ½ tsp cardamom powder
3.       Take ghee in a pan. Add sliced dryfruits to it. Roast them until the dry fruits turn brown and gives a nice aroma.Here i have used roasted vermicelli, if you don’t have roasted vermicelli u can roast them in the same pan with ghee until it turns pink.
4.       Keep yhe roased fryfruits & vermicelli aside
5.       Now in the same pan, add 1 ltr milk & bring it to boil
6.        Once the milk is boiled add khoya/mawa
7.       Stir them well to avoid formation of lumps.
8.       Once the milk has turned nice and thick add vermicelli/sevai to it. Cook it for about 10 mins
9.       Now add sugar, cinnamon powder & roasted dry fruits
10.   Check for sweetness & add sugar if required
11.   Cook all these mixture for 5 mins
12.   Switch off the flame & now this rich & tempting kheer is ready to be served.

Serving- Serve this dish with some roasted dryfruits. You can enjoy this hot or cold.
Serves 6 Pax.
Watch it on YouTube:


Share
Tweet
Pin
Share
No comments
Older Posts

About Me

My photo
Sujata Kotian Das
Cooking has been my passion since I was a child. I used to watch my mother cook when I was a small kid which inspired me to become a better cook. I am a food blogger who love to do some experiments in my kitchen mostly with Indian food recipes and share it with the world. Happy Cooking!
View my complete profile

Follow Me

  • facebook
  • instagram
  • pinterest
  • twitter
  • Youtube
  • reddit

Latest YouTube Video

Facebook

The Foodie Curls

recent posts

Blog Archive

FOLLOW ME on Instagram

© The Foodie Curls | Created with by ThemeXpose | Copy Blogger Themes