Powered by Blogger.
  • Home
  • Disclaimer
Facebook Instagram Pinterest Twitter Youtube reddit

The Foodie Curls Indian Recipes

Banana Malpua Recipe

Banana Malpua
Malpua is an Indian pancake-like-dessert which is made of rice flour / maida in oodles of ghee / oil and sugar syrup. The traditional sweet has been a festive staple since time immemorial. For the longest time in Indian households, Malpuas were associated with celebrations or was prepared when there was a good news or when someone visited home from far abroad. Adding banana in the batter is more of a Bihari and Oriya thing. In UP & Rajasthan, it's not added.

Malpuas history goes back to the ancient Vedic times. Some food Historians also dub the sweet dessert as one of the oldest desserts of the Indian subcontinent.

Preparation time: 10 mins
Cook time: 20 mins
Fetch: 12 malpuas (medium size)

Ingredients:
1 cup All purpose flour
1 cup sugar 
2 tbsp Semolina/ Rava
2 ripe Bananas 
Handful of nuts
1 tsp lemon juice
Oil to fry
Saffron (optional)

You can watch video recipe on my YouTube channel
Please don't forget to like, subscribe, comment your thoughts and share with your family & friends.


Method:
  • Take 1 cup hot milk add 1/2 cup sugar to it. Keep it aside for 10 mins to dissolve 
  • Mash 2 ripe bananas and keep it aside
  • Now once the sugar gets dissolved add 2 tbsp semolina to it
  • Add 1 cup all purpose flour gradually, make sure there shouldn’t be any lumps. I have made use of the the whisk for lump free batter
  • Add mashed bananas and 2 tsp fennel seeds and nuts of your choice to the batter 
  • Mix everything well, cover and keep the batter ad side for 15 mins
  • Until then prepare sugar syrup 

For Sugar Syrup:
  • Heat a pan, add 1 cup of sugar and 1 cup of water, let it boil.
  • When the syrup starts boiling, add lemon juice and simmer the heat to the medium flame. You can add saffron (optional)
  • Boil it for another 10 mins, Stir in between to check the consistency of syrup.
For frying:
  • In a shallow pan heat oil for deep frying
  • Mix the batter and pour a small ladle full (approx 2 tbsp) in the hot oil. (The oil should not be too hot)
  • Simmer the heat to low and fry the malpua on both the sides till golden brown.
  • Remove from oil and dip in the sugar syrup for 2 minutes.
  • Serve hot as such or with rabdi.

Notes/Tips:
  • Make sure the batter is lump free and smooth.
  • You can use ghee instead of oil
  • The oil should be very moderately hot. Do not fry the fry the Malpua in very hot oil otherwise they will be raw from inside.
  • Try to use a shallow non stick pan to fry the Malpua.
  • A good malpua is crispy on the edges and soft in the centre.
  • The sugar syrup should be very hot when we soak the malpua in it.

Follow me:
https://www.instagram.com/thefoodiecurls
https://www.facebook.com/thefoodiecurls
https://www.youtube.com/thefoodiecurls
https://www.twitter.com/thefoodiecurls
https://www.pinterest.com/thefoodiecurls
Share
Tweet
Pin
Share
No comments

Blueberry Chocolate

Blueberry chocolate

Hi guys, I'm back with another chocolate recipe. I somehow could not take my mind off chocolates of late and the best ones are those which have those amazing fillings in them. Here I have infused these dark chocolate delights with blueberry sauce. Dark chocolate and blueberries are a natural combination. The tangy, sweet tart blueberry sauce and the slightly bitter dark chocolate go so well together.
I always make homemade blueberry sauce. It’s so super easy, there’s really no reason not to. With the blueberry sauce leftover, I usually use it as a topping on bread or in any desserts

Make these for your holiday get together, birthday, anniversary and I promise you and your guests won’t be disappointed. For more dessert options, check out my No oven Eggless Chocolate cake and 3 ingredients Biscuit cake


Preparation time: 20 mins
Cook time: 15 mins
Total time: 35 mins
Yields: 20-22 Chocolates


Ingredients

250gms Dark compound Chocolate/semi dark chocolate
100 grms Blueberries
2 tbsp Sugar
1/2 tsp Cornflour
1/2 cup water
Nutmeg powder(optional)


You can also watch the making of this recipe on my YouTube Channel in Hindi:
Your comments and feedback's are most welcome. Please support me by subscribing to my channel.

Method

Blueberry Sauce

  • In a pan add blueberries, sugar and water. Mix well in medium flame.
    blueberry
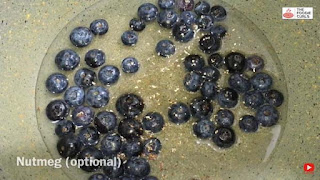
  • Add nutmeg powder (optional) to get a nice flavour
    blueberry
  • Cook for 5 mins you will notice the blueberries will start oozing out its colour
    blueberry sauce
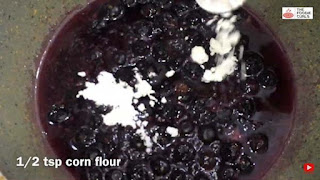
  • At this stage add 1/2 tsp Cornflour so as to thicken up the solution
    blueberry thickner
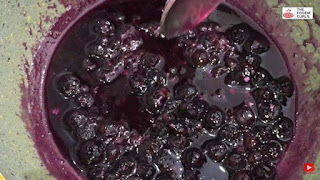
  • Mix well and cook for 10 mins or until it forms a syrup like consistency
    blueberry sauce
  • Switch off the flame and let it cool for 10 mins
  • After 10 mins you will notice the syrup will turns more thicker
  • You can store this sauce in a airtight jar for about 15-20 days

Chocolate

  • Now let’s start preparing chocolate. Cut the chocolate bar into pieces and place it in a thick bottom glass or metal bowl.
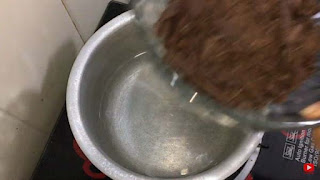
  • With a double boiler, bring some water to a simmer in a pot and then fit the glass or metal bowl over the top of the pot. The steam from the simmering water will heat the chocolates in the bowl.
    pot
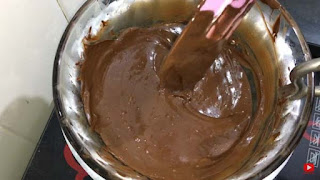
  • Switch off the flame once the chocolate is completely melted and turns smooth and shiny
    melted chocolate

Blueberry Chocolate

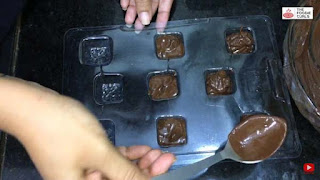
  • Now pour the mixture in a mold. Pour a spoonful into each spot. Tap the mold firmly on the table to release any air bubbles in the chocolate.
    chocolate mold
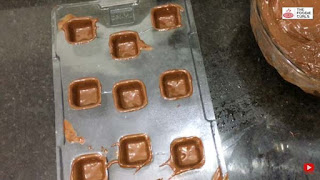
  • Invert the mold on the bowl and tap it until it forms the outer layer/crust of the chocolate (watch video for process)
    chocolate mold
  • Place it in the fridge for 10 mins till they become little hard. Until then repeat the same process with other mold
    chocolate mold
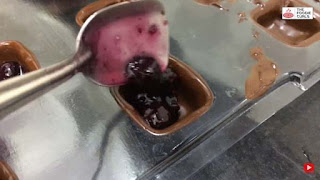
  • Take out the mold from the fridge and pour in 1/2 tsp of prepared blueberry sauce in each spot of the mold. Just ensure not to overfill it.
    blueberry filling
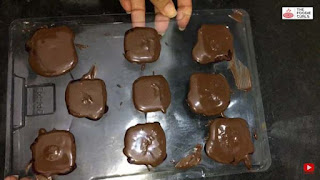
  • Pour a little more melted chocolate over the top of each spot in the mold to seal it and tap again to smooth out the chocolate
    chocolate
  • Set the chocolates in the fridge to firm up the chocolate. 
    chocolate mold

    chocolate mold
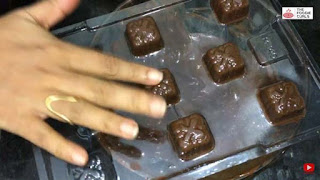
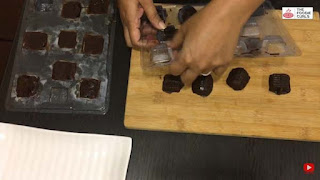
  • When the chocolate is completely set, release it from the mold by pressing upwards on the bottom of each mold.
    chocolate

    chocolate
  • Take the pieces out and munch away!
    Sujata Kotian

Note/Tips

  • Try to use a deeper mold, it will be easy to fill in the sauce and will also fetch good results
  • You can use any chocolate (dark, milk etc) of your choice
  • If blueberry is not readily available you can use any berries or nuts (like almond or peanuts) of your choice
  • It took 5 hours for me to set the chocolate. It may vary accordingly.
  • Total time does not include cooling time for the chocolates.
Hope you liked my recipe. If you did, please do subscribe to my blog for many more wonderful recipes.

Love, Sujata
Share
Tweet
Pin
Share
No comments

Ganesh Chaturthi Special: Instant Kesar Mawa Modak recipe Mawa kesar modak

This time for Ganesh Chaturthi, I decided to make some kesar/saffron mawa modak which is a favorite sweet of Lord Ganesha, and it completes the rituals of Ganesh Chaturthi. It is an easy and quick sweet made with dried milk/milk powder. You just need basic three ingredients to make it. I have added saffron and flavoured it with cardamom. You can think of your own variations. You can even add some nuts like pistachios, almonds and cashews. Have made this recipe from scratch that is from making instant mawa to making of Modak. You can also used ready made mawa/ khoya to your recipe. Ganapati Bappa Morya!!!!

This recipe is also available on my YouTube channel:


Please don't forget to like and subscribe my YouTube channel.


Prep time: 10 mins
Cook time: 10 mins

Ingredients (1 cup=250ml)

1/2 cup/125 ml whole cream milk
1cup/ 125gms milk powder
3 tbsp powdered sugar/ as required
3 tbsp Ghee
1 pinch Saffron/Kesar
1/2 tsp Cardamom powder (optional)
Dry nuts (optional)


Method:
  • Soak kesar / saffron in 1 tbsp warm milk for 10 mins
  • Until then in a heavy bottom pan melt 3 tbsp ghee on medium flame
  • Once ghee is melted add milk and soaked saffron .
  • Mix well until milk is heated
  • Once milk starts boiling add milk powder in batches keep stirring it continuously. Break lumps if any. Keep the flame low.
  • The khoya / mawa mixture will begin to thicken
  • After 3-4 minutes you will notice that it starts to separate from the pan. Cook for another couple of minutes until it forms a dough like consistency.
  • Now switch off the flame and place it in a bowl and let it cool down for few minutes. Don’t let it cool down completely or else mawa will turn hard and it will also become difficult to shape the Modak. 
  • To the semi cooled mawa add sieved powdered sugar and cardamom powder and mix till everything is well combined. The mawa mixture is ready.
  • Now take a modak mould and put some mawa mixture on all the sides of the mould and press it firmly, and then close it. Ensure that the modak mould is stuffed entirely. Remove the excess mawa from the sides and gently open the mould. 
  • Now while pressing the bottom of the modak, remove it from the mould. 
  • Similarly make all the mawa modaks. 
  • Alternatively you can also stuff crushed nuts in the middle of the modak (for clear demo please watch video)
  • Store them in airtight container it has shelf life of one week.

Modak recipe step by step procedure with pictures:

  • Soak kesar / saffron in 1 tbsp warm milk for 10 mins
    kesar mawa modak recipe method 1
  • Until then in a heavy bottom pan melt 3 tbsp ghee on medium flame
    kesar mawa modak recipe method 2
  • Once ghee is melted add milk and soaked saffron
    kesar mawa modak recipe method 3

    kesar mawa modak recipe method 4
  • Mix well until milk is heated
    kesar mawa modak recipe method 5
  • Once milk starts boiling add milk powder in batches keep stirring it continuously. Break lumps if any. Keep the flame low.
    kesar mawa modak recipe method 6 
    kesar mawa modak recipe method 7
  • The khoya / mawa mixture will begin to thicken
    kesar mawa modak recipe method 8

    kesar mawa modak recipe method 9
  • After 3-4 minutes you will notice that it starts to separate from the pan. Cook for another couple of minutes until it forms a dough like consistency.
    kesar mawa modak recipe method 10
  • Now switch off the flame and place it in a bowl and let it cool down for few minutes. Don’t let it cool down completely or else mawa will turn hard and it will also become difficult to shape the Modak. 
    kesar mawa modak recipe method 11
  • To the semi cooled mawa add sieved powdered sugar and cardamom powder and mix till everything is well combined. The mawa mixture is ready.
    kesar mawa modak recipe method 12

    kesar mawa modak recipe method 13
  • Now take a modak mould and put some mawa mixture on all the sides of the mould and press it firmly, and then close it. Ensure that the modak mould is stuffed entirely. Remove the excess mawa from the sides and gently open the mould. 
    kesar mawa modak recipe method 15 

    kesar mawa modak recipe method 16
  • Now while pressing the bottom of the modak, remove it from the mould. 
    kesar mawa modak recipe method 17
  • Alternatively you can also stuff crushed nuts in the middle of the modak (for clear demo please watch video)
    kesar mawa modak recipe method 18

    kesar mawa modak recipe method 19
  • Mawa Kesar Modak is now ready to be served to Lord Ganesha
    mawa modak for ganesha
Notes
1. If the mawa mixture  becomes hard. In this case you may add some milk to the mixture and re-heat it for some time. 
2. Avoid adding powdered sugar to hot mawa mixture, it may turn very loose. Still, if the mixture has loose consistency, then add some powdered Sugar to the mixture. If the mixture is already very sweet, then you may add some Milk powder or Cashew Powder / Almond Powder to adjust the consistency.

3. In case of non-availability of saffron you can also make plain mawa modak.

4. In case you don’t have mould then you can shape modak with your hands by taking a lemon size mawa ball, give it a cylindrical shape and make design using fork or toothpicks( for better demo please watch my video)

I hope you enjoy cooking this delicious recipe as much as you enjoyed reading it. If you tried, then please let me know in the comment section below. 
Subscribe to my blog for more such recipes.
Thank you!

---

Making maggie is easy but you can also make it delicious! Here's how
Share
Tweet
Pin
Share
No comments

Pineapple Kesari | Pineapple SheeraPineapple kesari recipe

Pineapple kesari is a sweet dish well known in southern India. It is also prepared in other regions of the country where it is called suji halwa, sooji ka halwa, semolina kesari, pineapple kesari bath, rawa Sheera. Pineapple kesari recipe is made from semolina, sugar, clarified butter and pineapple. Most of the ingredients and procedure will be same as basic sheera recipe. Only addition is the pineapple. Here I am sharing a very easy and quick recipe to make Kesari pineapple Sheera. It is used for prasad or can be made as a sweet dish or dessert.

This recipe is also available on my YouTube channel:
Please don't forget to like and subscribe my YouTube channel.

Serves : 5-6 Pax
Prep time : 5 mins
Cook time: 10 mins

Ingredients: (1 cup= 250ml)

1 cup rawa/ semolina
3/4 cup sugar or as required
4 tbsp Ghee
1 cup pineapple cut in cubes
1/2 tsp Cardamom powder
Raisins / cashew or almonds
A pinch of yellow food colour (optional)
Saffron for garnish (optional)

Method 

  • First chop pineapple in small cubes and keep aside 
  • In a pan take 1 tbsp ghee fry nuts and raisins. Keep them aside 
  • In same pan fry pineapple pieces for about 5 minutes or until the moisture evaporates 
  • Add 2 tbsp ghee roast semolina/ rawa in low flame until they turn light brown in colour 
  • To this add 2 cup hot water slowly and carefully. It may sizzle since semolina and water both are hot so be careful in handling 
  • Mix well. Cover with lid and let it cook for about 5-7 minutes in low flame 
  • After 5 – 7 minutes, open lid and add sugar at this stage. Mix well until they caramelize.
  • Add yellow food colour which is optional and mix it well.
  • Add roasted nuts and pineapple and crushed cardamom powder.
  • Give it a nice mix and your delicious mouth watering dessert is ready to be served
  • Garnish with nuts or saffron and serve hot 

Note: 

Always use ripe and sweet pineapple. Taste your pineapple first and accordingly adjust the sugar quantity. Mine was really sweet and juicy. So I have used just 3/4 cup of sugar which gives perfect sweetness.

I hope you enjoy cooking this delicious recipe as much as you enjoyed reading it. If you tried, then please let me know in the comment section below. 
Subscribe to my blog for more such recipes.
Thank you!

---

Instant Kesar Mawa Modak is something which you cannot miss. Click here for recipe  
Share
Tweet
Pin
Share
No comments

Moong Dal Ladoo / Peda

Moong dal peda ladoo
Moong laddu is a very simple sweet recipe. It can be made without any fancy with easily available ingredients. This instant recipe can be made on any occasion and festivals or can be served as a gift to your loved ones. Since festival seasons are around the corner I thought of showing some instant dessert recipe for you’ll. Here I have shaped the dough in peda as well as mini ladoo form. Moong dal ladoo have a striking resemblance to besan ladoo but trust me the taste of both the ladoos are different and moong dal being more healthier and simpler to make. To make it more healthier, you can substitute sugar with equal amount of powdered jaggery. You can also offer these ladoos/pedals as naivedyam to the deities.

Prep time: 5minutes
Cook time: 10minutes 


This recipe is also available on my YouTube channel in Hindi:
Please don't forget to like and subscribe my YouTube channel.

Ingredients (1cup= 250ml)

  • 1 cup/ 200gms moong dal/ husked and split moong lentils 
  • 1/2 cup powdered sugar (adjust depending upon the sweetness)
  • 4 tbsp ghee / clarified butter 
  • 4-5 green cardamom 
  • 6-7 almonds (or any nut of your choice)
  • 10-12 Raisins (for garnish)

Method 

  • In a heavy bottom pan dry roast moong dal in a low flame 
  • Roast for 10-15 minutes or until moong dal turns golden and aromatic.
  • Let it cool completely. In the meantime grind sugar and cardamom into a powder.
  • Sieve them in a bowl.
  • Once moong dal cools downs, grind it into fine powder.
  • Coarse grind almonds as well
  • Now transfer the moong dal powder in a pan, in a low flame add 3 tbsp ghee  and coarsely grounded almonds and roast them well for about 10 minutes or until the mixture turns golden brown 
  • Transfer to a bowl and cool slightly 
  • Now transfer the powdered sugar over the mixture and mix well 
  • Add 1 tbsp ghee or as needed to make it a semi moist flour mixture (do not overdo with ghee or else the flour will not stand its shape)
  • Take a small proportion and prepare a ball sized ladoo or peda and garnish with raisins/cashews 
  • Store it in an air tight container. It will be good for atleast 2 weeks.

Notes 

  • Make sure to use organic moong dal, else rinse the moong dal and pat dry before roasting.
  • Make sure not to over use ghee or else it will be difficult to give it a shape of ladoo or peda.
  • Adjust the amount of sugar depending on the sweetness.
  • Additionally, roast on low flame to prevent from burning.
I hope you enjoy cooking this delicious recipe as much as you enjoyed reading it. If you tried, then please let me know in the comment section below. 
Subscribe to my blog for more such recipes.
Thank you!

---

Kesari Pineapple Sheera is too yummy to miss. Click here for recipe 

Share
Tweet
Pin
Share
No comments
Fried Ice-Cream! Now that is one dish that you don't usually guess can possibly exist. It is a dessert which is so simple to make that it takes less than 5 minutes. This delicious dessert is made from scoop of any ice-cream of your choice with bread which is quickly deep fried. The outer cover has a thick crunchy crust and inside is a delightful creamy and cold ice cream. This unique dish requires only 2 ingredients.

Fried Ice Cream | Bread Fried Ice-Cream | Dessert Recipe

Fried Ice cream
Preparation time : 5 mins
Cook Time : 5 mins

Ingredients :


Bread slices
Ice-cream of your choice

Method

  1. Take two slice of fresh bread
  2. Take a scoop of any ice-cream of your choice and liking. (either store bought or my three ingredient Homemade Ice cream recipe)
  3. Place it over the bread.
  4. Place over the other slice of bread like a sandwich
  5.  Now with the help of cutter, glass or bowl cut the center of the bread to form a round shape or the shape you intend to.
  6. Quickly deep fry it in a low flame so as to avoid burning of the bread
  7.  Fry only for around 10 secs each side.
  8. Once the outer crust looks nice and golden brown take it out.
  9. Garnish with grated chocolate, chocolate syrup, choco-chips or icing sugar 
Note : In order to get the perfect Fried Ice Cream follow the below tips carefully:
  • Kindly used fresh baked bread so as to avoid the crumbles to fall off
  • If there are holes in the slice of bread then don't worry you can roll it with a pin to make it flat and the holes will also be covered.
  • Ice cream should be deep freezed or else it may get melted and make our bread soggy.
Hope you liked my unique and easy to make recipe, kids will definitely love this . Do try it at home and leave a comment .
For Hindi version please do subscribe to my Youtube channel. 


Share
Tweet
Pin
Share
No comments
Older Posts

About Me

My photo
Sujata Kotian Das
Cooking has been my passion since I was a child. I used to watch my mother cook when I was a small kid which inspired me to become a better cook. I am a food blogger who love to do some experiments in my kitchen mostly with Indian food recipes and share it with the world. Happy Cooking!
View my complete profile

Follow Me

  • facebook
  • instagram
  • pinterest
  • twitter
  • Youtube
  • reddit

Latest YouTube Video

Facebook

The Foodie Curls

recent posts

Blog Archive

FOLLOW ME on Instagram

© The Foodie Curls | Created with by ThemeXpose | Copy Blogger Themes