Powered by Blogger.
  • Home
  • Disclaimer
Facebook Instagram Pinterest Twitter Youtube reddit

The Foodie Curls Indian Recipes


Poha Chivda Easy Recipe

A traditional Maharashtrian or North Karnataka spicy snack made with thin flattened rice and other spices. It is popularly consumed as an evening snack with a cup of tea, but can also be served as a combo with Upma or pohe recipe. It is simple yet easy to prepare, and easily last longs for a couple of weeks.

This Poha chivda | Poha Namkeen is sweet and spicy, basically an "Indianized" version of a trail mix. Learn how to make this healthier, guilt-free snack with few teaspoons of oil which is just as good at the traditionally prepared, deep-fried poha chivda. 

Poha Chivda too is done in multiple ways and the main difference at times is the way the poha is cooked. Many like to fry it and use it in the mix. To make it healthier and to avoid all that oil, we simply roast it. Do not worry it will taste delicious and I bet you will definitely be craving for more.  I love this Roasted Poha chivda so much. It comes in handy for your tea time snack and so easy to make and bursting with flavors. You can also add roasted Makhana or any dry fruits of your choice 

You also watch the recipe video on my YouTube Channel


Ingredients 

2 cup thin poha/ flattened rice
2 tbsp peanuts
1 tbsp roasted chana/daliya
Almonds and raisins
4 green chilli 
Curry leaves 
1/2 tsp turmeric powder 
1 tsp sugar
Salt/ Black salt/ chat masala 

Poha Chivda recipe 

Steps/Method to make Roasted Poha Chivda 

  • Heat up a deep pan/kadai add thin poha and dry roast until it turns slightly golden-brown and crisp
  • Transfer in a bowl
  • Deep Fry peanuts, roasted chana, almonds and raisins.
  • Drain out the excess oil in a paper towel
  • Add approx 2 tbs oil in the same pan/kadai where you roasted poha
  • Add some curry leaves
  • Add chopped green chillies (as per taste)

  • Add 1 tsp turmeric powder (haldi)
  • Add salt as per taste, also add some kala namak/ black salt/ chat masala
  • Add 1 tsp powder sugar (or as per taste)
  • To this add roasted poha and fried nuts and mix gently
(Keep this chivda in air tight container. Try to consume within 15-20 days)
Here's your Super Crunchy Snack Poha ka Chivda ready!!!

Please subscribe to my blog for more such recipes

Share
Tweet
Pin
Share
No comments
Basa is a bland fish and does not have any natural strong flavours in it. The sauce is the key to make this fish recipe a success. This garlic butter fish recipe takes 20 mins. Serve alone or with pasta or mashed potatoes for a wholesome dinner. I enjoyed my butter garlic basa along with mashed potatoes.I have written the recipe for mashed potatoes which you can find - here-. Me and my husband love fish and we enjoy all kinds of fish recipe like Mangalorean traditional Bangudepulimunchi recipe, Surmai curry recipe and Bombil fry fish recipe.

Basa Garlic Butter recipe
Garlic and butter are two magic ingredients that go well with any kind of protein, including fish recipes.

Basa Fish ingredients

  • 1/2 kg Basa fish
  • 2 tbsp Butter
  • 2 tbsp Garlic
  • 1/2 finely chopped onion
  • Pepper powder
  • Lemon
  • Salt

 Garlic butter sauce

How to make garlic butter sauce for fish recipes? This magical sauce is very easy to make and calls for four simple 

Ingredients: 

  • Minced garlic
  • Melted butter
  • Lemon juice
  • Chopped parsley/ Coriander leaves
You can watch this recipe video on my YouTube Channel as well:


How to make Butter Garlic Basa fish

Step 1: Wash Fish
 
Rinse basa fillets under running water, and pat dry with kitchen paper
 
Step 2 : Marinate Basa
 
Marinate the fish fillet with salt and pepper. Keep it aside for atleast 30 minutes 
 
Step 3 : Coat Basa
 
Coat Basa fish with 2 tbsp of Maida/ All purpose flour. This coating will make the fish crisp from outside
 
Step 4: Cooking
 
Heat a pan with 2 tbsp butter once the butter is melted at 1/2 medium sized finely chopped onion and 2 tbsp minced garlic. Sauté for 2 mins. To this place the marinated Basa fillet carefully. Flip it over after a minute or until light brown. Basa doesn’t take much time to cook. Finally once the fish is cooked add 2 tbsp of lemon juice over it. Keep the flame medium to low during entire cooking.
 
Step 5: Serve 
 
Serve Basa fish with mashed potatoes or Pasta 
 
Tip/ Notes

Basa also nice over salad greens or in a fish taco

Share
Tweet
Pin
Share
No comments
Creamy, buttery, and delicious, this is the best and creamiest mashed potatoes recipe you will ever find. It has the most velvety and smooth texture that literally melts in your mouth. It's so easy to make in under 15 minutes. They’re as much a part of Thanksgiving dinner. The wonderful thing about these mashed potatoes is, they can be made ahead of time, then warmed in the oven when you’re ready.
So let’s make 'em
Mashed potatoes easy recipe

Mashed potatoes ingredients

2 large sized Boiled Potatoes
2 tbsp Butter
1/2 cup milk
Cilantro/ Coriander leaves
Salt

How to make Creamy Smooth restaurant style Mashed Potatoes 

 
Step 1: Boil Potatoes 
 
Take 2 Large Potatoes and boil it or pressure cook it for 3 whistles 
 
Step 2 : Mash Potatoes 
 
Mash the potatoes using a strainer ( check video for proper demonstration) Make sure there should be no lumps to make creamy textured mashed potatoes 
 
Step 3: Cooking
 
In a pan melt 2 tbsp butter add 1/2 cup milk and add the mashed potatoes and salt as per taste. Stir and cook until you get a creamy texture.
 
Step 4 : Garnish/ serve 
 
Garnish with fresh parsley or coriander leaves. Served creamy smooth Mashed Potatoes with Basa fillet.
 

Tip/ Notes

If you dont like parsley, get creative with your herbs. I tried some Italian seasoning once and it was lovely.

Share
Tweet
Pin
Share
No comments


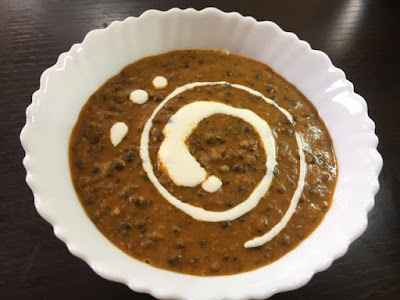
Dal Makhani is a rich, creamy & delicious vegetarian recipe made with black grams (Mah Ki Dal / kaali Dal / Urad Dal / lentils), red kidney beans (Rajma), butter and cream. Its a fairly simple recipe where the Dal and Kidney beans are soaked over night and then cooked in pressure cooker. The tomato puree which I have used in this Dal Makhani recipe is home made using 3 medium sized tomatoes. Also, the ghee used in this recipe is home made. I have used Amul cream and Amul butter in this recipe.
Makhani means “buttery”, so for this recipe whole black lentils (urad sabut) is cooked with lot of butter and cream. Along with urad sabut,  rajma (kidney beans) are also often added to this dal
How to make easy dal makhani recipe
Creamy Dal Makhani
It’s a rich dal and hence was made on special occasions only.

Dal Makhani is one of the most popular dals in India and it’s certainly my husbands favorite. It’s there on the menu of every Indian restaurant and in every Indian wedding and parties.

Cook time : 40 minutes

Ingredients:

  • 1 Cup Black grams/ black lentils / whole Urad Dal
  • 3 tbsp Red Kidney beans / Rajma
  • 2 Tbsp Ghee
  • 1 tsp cumin seeds / jeera
  • 1 tbsp ginger garlic paste 
  • 3 medium sized tomato (puree)
  • 2 tsp chilli powder
  • 1/4 tsp turmeric powder
  • 1 1/2 tsp coriander powder
  • 1/2 tsp cumin powder (jeera powder)
  • 1 tsp garam masala powder
  • 2 tbsp butter
  • 3 tbsp cream
  • Coriander leaves
  • Salt as per taste
You can also watch this video on my YouTube channel


How to make Dal Makhani 

Step 1- Soak Urad, Rajma Overnight & Pressure Cook The Next Day
To prepare this popular dish, soak sabut urad and rajma overnight in three cups of water. Drain it and pressure cook for 8-10 whistles in 2 cups of water with 1/2 tsp of salt. This makes the rajma and dal soft.

Step 2- Fry tomatoes and masala 
In a pan add 2 tbsp ghee/oil, add 1 tsp cumin seeds and 1 tbsp ginger garlic paste, fry for 1 min 
To this add 3 medium sized tomato purée, salt, 2 tsp chilli powder, 1/4 tsp turmeric, 1 1/2 tsp coriander powder, 1/2 tsp jeera powder and 1 tsp garam masala powder. Fry until oil starts oozing out of the Bhuna masala. 

Step 3- Add dal and Rajma 
Once the bhuna masala is ready you can add the pressure cooked Rajma and dal, and bring to boil. If you want your Dal Makhani to be smooth, you can crush the dal and rajma with the back of spatula and then add the dal and Rajma. To this add 2 tbsp of butter and 3 tbsp of cream this will make the Dal Makhani rich and smooth. Ads little water if required 

Step 4- Garnish with coriander leaves and serve hot with steamed rice, jeeta rice or butter naan or kulcha/ roti/ chapati.


Notes
  • Soaking – Soak the Dal and Rajma for a minimum of 8 to 10 hours or overnight. It helps in cooking the beans and dal faster.
  • Wash the Dal and Beans twice or thrice before soaking. If you have forgotten to soak the lentils, soak them in boiling hot water for 2 hours and then pressure cook.
  • Freshness – Make sure that the Dals and Beans are fresh and not aged. If they are old, they will take a lot of time cooking.
  • Butter & Cream – Do not compromise on Butter and Cream, as this Dal is known for its richness. Be generous with these two ingredients.
Have you tried making Dal Vada at home?
Share
Tweet
Pin
Share
No comments

Bangude Puli Munchi

bangude puli munchi


Bangude Puli Munchi is a zero oil Mangalorean recipe. Bangude / Bangda / Mackerel, Puli means tamarind and munchi means chilli in tulu language, which are the main ingredients. The recipe is a bit rustic and does not require any elaborate preparations. A masala paste of red chilies and other dry spices are made and fish is cooked in this masala paste with tamarind pulp and water. The dish can also be tempered with hot oil and curry leaves which I have avoided.
This recipe is quite popular along the coastal areas of southern Karnataka (Dakshin Kanada) and Udupi. If you like seafood than I am sure you will enjoy this Mangalorean delight. Prepare this recipe and share your feedback with us in the comment section below. 
In this blog post I have explained detailed recipe with step by step photos which should make it very easy for the reader to follow the recipe.

Preparation time : 10 mins
Cook Time :  20 mins

Ingredients

3 medium sized mackerel (bangda) or 1/2 kg
7-8 baydgi red chilli
2 tbsp coriander seeds
1 tbsp cumin seeds
1 tsp black pepper
1/2 tsp mustard seeds
1/4 tsp fenugreek seeds (methi)
1/4 tsp carom seeds (ajwain)
1 lemon sized tamarind
1 medium sized onion
4 - 5 cloves of garlic
1 inch ginger
2 green chilli (optional)
Salt as per taste

Recipe video available on my YouTube Channel in Hindi


Method to prepare Bangude Puli Munchi


  • Dry Roast 7- 8 baydgi red chilli for 2 - 3 minutes. Roasting enhances the taste of the masala.
  • Next, roast coriander seeds, cumin seeds, black pepper, mustard seeds, fenugreek seeds & carom seeds for 2 -3 minutes. The masala's will give out a distinct aroma once its roasted.
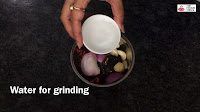
  • Add the roasted red chilli and masala's along with tamrind, 1/2 onion, garlic, ginger and little water to a grinder and grind it to a fine paste.
    grind into a paste
  • Next, in a deep pan add the freshly grounded masala along with 3 cups of water.
    3 cups of water
  • Mix well
  • Add 2 green chillies and finely chopped 1/2 onion. Stir well
    finely chopped onion
  • Add salt as per taste.
  • Close the lid and bring it to a boil and cook for 8 - 10 mins.
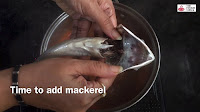
  • Now add the clean mackerel.
    clean mackerel add mackeral
  • Cook it for 7- 8 mins.
  • Your Bangude Puli Munchi is now ready to serve.
    bangda curry
    Serve hot with steamed rice or appam or dosa.

Tips
Do not stir the curry with spatula after adding fish as it may shred it.


Traditional recipes can also be easy and fun to cook. I hope you will enjoy cooking this recipe as much as I did. Bon Appetite!

Follow me:
https://www.youtube.com/thefoodiecurls
https://www.instagram.com/thefoodiecurls
https://www.facebook.com/thefoodiecurls
https://www.twitter.com/thefoodiecurls
https://www.pinterest.com/thefoodiecurls
Share
Tweet
Pin
Share
No comments

Dal vada/ Masala vada/ Ambode recipe
dal vada recipe
 

Masala vada recipe or chana dal vada recipe is a popular and delicious south Indian street food.These are also known as paruppu vadai as these are made of split bengal gram or chana dal. Masala Vada is basically lentil based deep fried snack. Soaked bengal gram is ground to rough paste with few spices and deep fried to get golden brown fritters. This crispy, spicy snack can be prepared as a tea time snack for your family. Here is how to make street style masala vada recipe with video.

Preparation time: 3-4 hours
Cook time: 20-25 mins
Fetches: 20 medium sized vadas 

Ingredients for dal vada:

  • 1 cup chana dal
  • 1 onion, finely chopped
  • 3-4 garlic cloves 
  • 3-4 green chillies
  • 2 dry red chilli
  • 1 tsp fennel seeds
  • 1 tbsp coriander leaves, finely chopped
  • Few curry leaves
  • Salt to taste
  • Oil for deep frying
Video recipe on YouTube:

Method to make Chana Dal vadas:

  • Wash and Soak chana Dal in water for 3-4 hours
  • Drain water and grind chana dal with garlic, fennel seeds and dry red chillies 
  • Grind it to a coarse paste 
  • Transfer the ground chana dal into a bowl. Add all the remaining ingredients like coriander leaves, onion, green chilli and curry leaves. Add salt as per taste.
  • Mix the ingredients thoroughly.
  • Heat oil in a deep bottom pan for frying. Make small portions of the mixture. Shape it into a ball and flatten it. Keep applying a little water or oil to your palm while doing so.
  • Gently put the vadas into the oil and deep fry on both the sides. Fry it until it turns golden brown. Transfer these vadas onto a strainer to drain off excess oil.
  • Crispy masala vadas are ready. Serve hot with coconut chutney or tomato ketchup.
Follow me:
https://www.youtube.com/thefoodiecurls
https://www.instagram.com/thefoodiecurls
https://www.facebook.com/thefoodiecurls
https://www.twitter.com/thefoodiecurls
https://www.pinterest.com/thefoodiecurls
Share
Tweet
Pin
Share
No comments

Shakkar para is a crispy, sweet, diamond or rectangular shaped Indian snack is usually made on the festivals of Diwali and Holi. In Maharashtra, this traditional snack is known as shankarpali. It’s worth to make this snack at home because the process is very easy and you just need a few basic ingredients like maida/refined flour, sugar, ghee, milk and oil.
shakkarpare

Shakkar para for some, is a very versatile snack and comes in a savory version too. Popularly known as namak-para or tukdi as it is referred to in some parts of South India.
You can check my Namak para recipe here: Namak Para

This recipe is also available on my YouTube Channel. Please like, subscribe, comment and share if you  liked it there.

Ingredients For Shakkar Pare Recipe

  • 2 cup (250g) maida/refined flour
  • 1/2 cup milk
  • 1/4th cup ghee/clarified butter
  • 1/2 cup (100g) sugar
  • Oil for frying
  • Pinch of salt
  • 1 tsp white sesame seeds (optional)

Method In Making Shakkar Pare Recipe

  1. In a large bowl take 2 cups of Maida, add pinch of salt, sesame seeds and powdered sugar. Mix everything well
  2. Now add melted hot ghee and mix again.
  3. Gradually add milk to the above mixture 
  4. Knead into a smooth dough. Once done, cover it and let it rest for 30 minutes.
  5. Divide dough into three equal parts.
  6. Now grease the rolling pin with ghee and roll the dough. Don’t roll it into very thin sheets, else the pare will become flat and wont become fluffy. For better understanding refer video
  7. With a knife or a pizza cutter, cut them into desired shape.
  8. In a pan heat the oil and fry the shakar paras on low flame until golden brown from both sides and fluffy. It will take around 8-10 minutes.
  9. Cool them completely before storing.
  10. Store in an  airtight container for up to One month.
Note:
  • You can also use cardamom powder instead of white sesame seeds/til.
  • You can substitute all purpose flour (Maida) with whole wheat flour Or even you can use half maida and half wheat atta.
Follow me:
https://www.youtube.com/thefoodiecurls
https://www.instagram.com/thefoodiecurls
https://www.facebook.com/thefoodiecurls
https://www.twitter.com/thefoodiecurls
https://www.pinterest.com/thefoodiecurls
Share
Tweet
Pin
Share
No comments

Pani Puri/ GOL Gappa/ Puchka recipe 
how to make pani puri

What is Pani Poori?
Pani Poori also known as GOL Gappa or Puchka refers to a popular Indian street food, made with slight variations in different parts of the country. Pani means water in Hindi and Puri is the puffed, fried Indian bread. Small, hollow, deep-fried crisp pooris are first filled with a stuffing made using potatoes and black chickpeas (chana). And then topped up with two different types of pani or flavoured water – a sweet one made using tamarind and jaggery, the other one spicy, made from fresh mint, coriander, green chillies etc. The result is a burst of flavours, perfectly puffed up crispy puris filled with potato-based stuffing, loaded with flavorful pani.
Make this crispy Pani puris at home and share your experience...
You can visit my YouTube channel for other recipes.
You may also like Instant Potato Chips recipe.

Ingredients for pani puri: 

For Sweet Chutney
  • 100 g Dates, boiled
  • 1 marble-sized ball of Tamarind
  • 1 tsp Chilli Powder
  • 1 pinch Black Pepper
  • 1 pinch Salt
Grind all ingredients together and keep it aside.

For Spicy Chutney
  • 1 cup Cilantro/coriander Leaves
  • 1/2 cup Mint Leaves
  • 5 Green Chillies, coarsely chopped
  • 4 cups Water
  • 2 Cloves
  • 1 small Cinnamon Stick
  • 2 Cardamom
  • 1 tsp Cumin Powder
  • 3 tbsp Jal Jeera Powder (available in most Indian grocery stores)
Grind the cilantro/dhaniya patta, mint and green chillies together with the water and salt.
Roast the cloves, cinnamon, cardamom and cumin on a medium heat in a saucepan. Grind to a fine powder.
Mix the roasted and ground spices and the jal jeera powder with the ground cilantro mixture.

Stuffing for the Puri
  • 1/2 cup Green Moong Dal/ Green Lentils, soaked in water until tender
  • 1/2 cup Garbanzo Beans/ Kabuli Channa, soaked in water and then boiled
  • 5 small Potatoes, peeled and boiled
  • 3 tbsp Channa Masala/ chat masala (available in all Indian grocery stores)
Combine all ingredients together with a little salt to taste. Due to lockdown I have used Boondi here.

For Puri / Gappa:

• Maida/ Plain Flour (Maida)- 1/4 Cup
• Whole Wheat Flour (Atta) – 1/4 Cup
• Semolina (Suji) – ¼ Cup
• A Pinch Of Baking Soda
• Salt To Taste (Namak)
• Oil To Fry

INSTRUCTIONS:
pani puri

For Puri / Gappa:

  • Add in the suji, maida, atta, salt and baking soda to a mixing bowl. Mix thoroughly.
  • Knead to make the smooth dough using sufficient water. (Add water little by little)
  • Cover this dough with damp cloth and set aside for 30 mins.
  • Divide dough into 4 portions and roll them into balls.
  • Take one portion of dough and cover rest of the balls with a damp cloth.
  • Dust a working surface with some dry flour.
  • Using a rolling pin roll out a thin almost translucent circle.
  • Cut it using a round cookie cutter/glass/lid. We need all equal sized small circles.
  • Arrange them on a plate and cover with a damp cloth.
  • Heat oil in a pan or kadhai to very high. 
  • Now drop these puris into hot oil and press them in the center and on the edges using a spatula or ladle, this will puff up the puris.
  • Reduce the heat and fry them until golden.
  • Drain the puris out from the oil using a strain ladle and place on a tissue paper.
  • Let them cool completely. Repeat the steps from 10-14.
  • Then store in an airtight container and use when required.

How to Eat Pani Puris:

Crush the top of the puri a bit. Stuff the puris with the stuffing, add a little bit of the sweet chutney, dip into the spicy water and eat in one bite. 
Enjoy!

Follow me:
https://www.youtube.com/thefoodiecurls
https://www.instagram.com/thefoodiecurls
https://www.facebook.com/thefoodiecurls
https://www.twitter.com/thefoodiecurls
https://www.pinterest.com/thefoodiecurls
Share
Tweet
Pin
Share
No comments
Older Posts

About Me

My photo
Sujata Kotian Das
Cooking has been my passion since I was a child. I used to watch my mother cook when I was a small kid which inspired me to become a better cook. I am a food blogger who love to do some experiments in my kitchen mostly with Indian food recipes and share it with the world. Happy Cooking!
View my complete profile

Follow Me

  • facebook
  • instagram
  • pinterest
  • twitter
  • Youtube
  • reddit

Latest YouTube Video

Facebook

The Foodie Curls

recent posts

Blog Archive

FOLLOW ME on Instagram

© The Foodie Curls | Created with by ThemeXpose | Copy Blogger Themes