Powered by Blogger.
  • Home
  • Disclaimer
Facebook Instagram Pinterest Twitter Youtube reddit

The Foodie Curls Indian Recipes


Homemade Potato wafers | Potato chips recipe
Homemade Potato Wafers Recipe


A simple and easy recipe for homemade potato chips that is crispy and delicious.
Here are step by step procedures to make potato wafers at home. This is a popular snack which is almost loved by everyone. Forget buying bag of potato chips from stores when you can make it easily at home. Since they are made at home, you could be sure about the quality too.

Ingredients


250 gms Potato 
Oil for deep frying
1/2 tsp chilli powder/ pepper powder 
Salt to taste 

You can also watch the video of potato wafers on my YouTube Channel
Don't forget to subscribe, comment & share :)


INSTRUCTIONS/ Method 


  1. Firstly, peel the skin of potato and wash into cold water for at-least 2-3 times.
  2. Wipe the potatoes with dry cloth thoroughly 
  3. Further slice the potatoes, drain and pat dry over a kitchen towel/ tissue paper this prevents oil from spluttering.
  4. Take the sliced potato one by one and deep fry in hot oil in batches.
  5. Further, reduce the flame to medium and fry.
  6. Stir occasionally and fry on both the sides.
  7. Once the potato slices turns crisp and slight golden spots start to appear over the edges, drain off the potatoes over kitchen towel or strainer to remove excess oil.
  8. Also immediately sprinkle some salt and chilli powder/pepper over chips and mix gently.
  9. Finally, potato chips are ready to serve.

 Note/ Tips:

  • Let the potato slices be even in thickness. Not too thin, not too thick. Check video for reference.
  • Regulate heat as and when needed. When you drop the potato slices, let the oil be hot. Towards end, you can try to put in medium to not let the chips change colour, yet turns crispy.
  • Consume immediately

Follow me:
https://www.youtube.com/thefoodiecurls
https://www.instagram.com/thefoodiecurls
https://www.facebook.com/thefoodiecurls
https://www.twitter.com/thefoodiecurls
https://www.pinterest.com/thefoodiecurls

Share
Tweet
Pin
Share
No comments

Sweetened Condensed milk recipe 

sweetened condensed milk


This Homemade Sweetened Condensed Milk recipe makes a delightful, creamy and smooth condensed milk, just the same which you get ready-made from the store. You can make almost endless things with this one ingredient condense milk or sweetened condensed milk sold under different commercial names such as Milkmaid in India. This one ingredient can be used in making so many different types of dessert dishes; baking Cakes, puddings, Indian sweets/mithai, halwas and the list is never ending.
Although condensed milk is easily available in market these days it is always advisable to make your own version at home and store it for later purpose. The ready made condensed milk comes with preservatives which is not always good for health. And then its so easy to make at home that I simply can’t resist. So, why buy that overpriced canned stuff? When you can make Fresh at home, that too with real natural ingredients. Adding Baking soda is optional however I would suggest to use a pinch of it as it will thicken the condense milk and also keep it stay fresh for longer.
Do try this once and let me know your comments how it turned out.

    You can also watch this recipe video on my YouTube channel:

 Hope you like my recipe, and if you do, please leave a comment, share with your friends, smash the like button and consider Subscribing to my YouTube channel. All of this really helps me keep going! Thank you in advance and hope you enjoy!

Cook time : 40 mins
Serves : Approx 300 ml

Ingredients 

500 ml milk
Sugar 1 cup
Baking soda 1 pinch(optional)

Method 

  1. In a heavy bottom pan, pour in the milk and bring it to boil
    sweetened condensed milk method
  2. Now add sugar and heat it on a low heat until the sugar is dissolved
    sweetened condensed milk method
  3. Once sugar gets dissolved bring the heat on a medium to high flame
  4. Keep stirring regularly and scrap the sides of the pan so as to to get an even consistency
    sweetened condensed milk method
  5. It should take about 20 mins for it to reduce. Milk can froth up and boil over anytime, keep an eye.
  6. We just need to stir this and cook, that's it. Suddenly after 15-17 mins you should see a very vibrant color to it and the texture will be very frothy.
    sweetened condensed milk method
  7. At this stage add the baking soda. Stir well for about 5 mins and let it cool down at room temperature 
    sweetened condensed milk method
  8. It will thicken up once it cools. You can store this condensed milk in an air tight container for around 30 days in refrigerator 
    sweetened condensed milk method

Chocolate sauce/ syrup recipe 

 
Chocolate sauce


This chocolate sauce takes only 10 minutes of cooking time, and it is much better than any store-bought chocolate sauce. Purchased chocolate sauces won't taste the same after you sample this fresh, rich, and very chocolate-dense version.
This syrup is delicious over ice cream or as a base for an intense hot chocolate. Can also be used for baking cakes and fudges. Do try this once and let me know your comments how it turned out.

Preparation time: 5 mins
Cook time: 10 mins

Ingredients

1/4 Cup sugar
1/2 Cup cocoa powder
1/4 Cup sweetened condensed milk
1/2 Cup water

Method 

  1. In a sauce pan or any thick bottom pan take sugar, cocoa powder and water
  2. Mix them well until everything is well combined
    Chocolate sauce method
  3. Cook this mixture on a medium flame 
  4. Once the sugar melts add condensed milk and keep stirring the mixture
    Chocolate sauce method
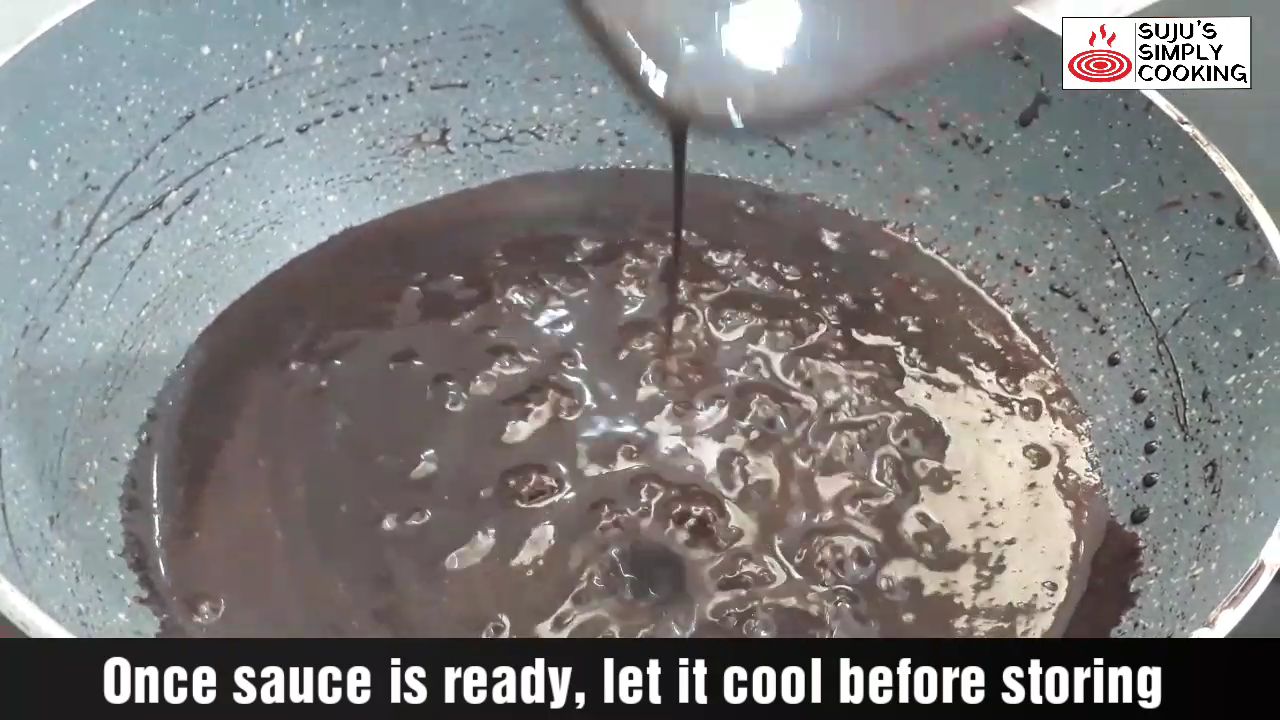
  5. Cook this mixture for about 5 minutes
    Chocolate sauce method
  6. Do not over cook them until sauce is very thick as it thickens once it cools down
    Chocolate sauce method
  7. It can be stored in a air tight container for up to a month in the refrigerator.
    Chocolate sauce method
    Hope you liked my recipe. If you did, please do subscribe to my blog for many more wonderful recipes
    Love, Sujata
---

You can use this recipe to make No Oven Egg-less Chocolate Cake. Click here for recipe 
Share
Tweet
Pin
Share
No comments


Onion Bhajiya | Pakoda | Kanda bhajji


One of the most loved snack in Mumbai is onion bhajiya also called Kanda (onion) bhajiya/Onion fritters. This crunchy delight is best for evening snacks along with a cup of tea or coffee. Here I have prepared this dish without adding baking powder still keeping it crunchy and tasty.

Preparation time : 10 mins

Cooking time : 15 mins

Ingredients

2 medium sized Onions 2 green chili 1 tsp crushed Coriander seeds 1/2 tsp Cumin seeds 4 tbsp Gram flour/Besan Coriander leaves
Cooking oil
Salt as per taste

Method :

  1. Take sliced onion in a bowl. Make sure to slice the onion thin.
  2. Now add finely chopped green chili, Crushed Coriander seeds,Cumin seeds, coriander leaves, salt as per taste & 4 tbsp besan/Gram flour
  3. Mix well without adding water reason being onion has its own moisture.
  4. Make sure all the onion slices are coated well with besan/gram flour.
  5. Heat oil in a deep pan over medium flame for deep frying. Once oil is hot add a spoonful of mixture in hot oil.
  6. Fry them until they become golden brown on both sides. Keep turning the pakodas/bhajiyas for even frying.
  7. Make sure to fry few bhajiyas at a time so that you do not overcrowd them.
  8. Remove them in a kitchen towel & serve them hot.
Serve with garlic-groundnut chutney, coriander chutney/mint chutney, ketchup or can have with fried green chili along with tea or coffee.
Serves : 3 Pax
Kanda bhajiya

Share
Tweet
Pin
Share
No comments
Of one of the many delicacies which are native to the southern Karnataka region of Tulunad (Tulunadu), Neer Dosa is one of the most noticeable and the simplest. Neer Dosa gets its name from the word 'Neer' which means water in Tulu language due to it's watery consistency. Like other dosa recipes available in the region of southern India, neer dosa does not require overnight fermentation and can be made instantly. 

Neer Dosa / Rice Crepe

Neer Dosa
Stove to serve : 20 mins

Ingredients
2 cups Soaked Regular Rice
Cooking Oil
Salt

 Method:

1.     No need to ferment the rice to make Neer Dosa
2.     The rice needs to be soaked for atleast 2 hours
3.     After wash drain the water & ground by adding water & salt as per taste to get a very fine batter
4.     Take it in a bowl & add one more cup of water to get a flowing & thin consistency
5.     Heat the pan, spread little oil & pour the batter evenly on the pan. The batter will sizzle and flow to spread itself. Fill in the batter where there are gaps.
6.     Cover the lid & let it cook for about 30 seconds, Neer Dosa cooks very quickly, when you notice the top of the Dosa is no longer raw, the Neer Dosa is cooked and has a rich white colour.
7.     With the help of flat spatula slide from the sides of the pan and fold the Neer Dosa into half and then into another half to form a triangle. Similarly make other Neer Dosa’s following the same method.
8.     Make sure you place the Neer  Dosa’s away from each other when they are hot, as they tend to stick to each other.
Serve warm, with coconut chutney, sambhar, chicken gravy or can have plain with tea as well.
Serves 4 Pax
Watch the video on my YouTube Channel:


Share
Tweet
Pin
Share
No comments

Homemade Dahi / Curd / Yogurt

dahi recipe 
I have personally struggled a lot to get that perfect dahi (curd / yogurt) with cream/malai. So I thought of sharing this experience with others who are new or still struggling to make good dahi. Here is a step by step method of making curd with few tips.


Hope you like my recipe, and if you do, please leave a comment, share with your friends, smash the like button and consider subscribing to my YouTube channel. All of this really helps me keep going! Thank you in advance and hope you enjoy!

Prep Time – 10 mins

Ingredients

1 ltr Milk (Whole / full  fat milk)
1 tbsp Starter / curd

Method :

  • Always use full cream milk for thick curd. Get the milk to boil on medium flame stirring occasionally.
  • Once the milk comes to a boil , simmer for 2-3 mins & keep beating the milk this helps to get creamy curd.
  • Turn off the flame and allow to cool slightly (lukewarm). The temperature of the curd should be such that you can easily touch with your finger.
  • Add 1 tbsp of curd into lukewarm milk.If u live in cold place add around 3 tbsp of starter/curd for 1 ltr milk
  • Cover & rest in warm place for atleast 7-8 hours
  • After 8 hours , the milk will be fermented into curd
  • Refrigerate the curd or else it will start turning sour.

 Note/Tips :

> During winters, use casserole to set curd. Another trick is to preheat the microwave to 200 degree before switching it off and then place the casserole/container inside it.
>The other method is that you put some hot water in your casserole, keep the vessel which contains the milk and starter in it and close the lid
>Also you can use woolen cloth or blanket to cover the casserole/container. This will ensure proper warmth and heat
>If you want low calorie curd go for toned or skimmed milk.
>Get the starter / curd in room temperature this will expedite the process of curd formation.
>Milk should not be very hot this makes the curd runny. Use warm milk to set curd.

Dahi Recipe Step-by-Step with Pictures:

  1. Always use full cream milk for thick curd. Get the milk to boil on medium flame stirring occasionally.
    Dahi Recipe method
  2. Once the milk comes to a boil , simmer for 2-3 mins & keep beating the milk this helps to get creamy curd.
    Dahi Recipe method
  3. Turn off the flame and allow to cool slightly (lukewarm).
    Dahi Recipe method
  4. Add 1 tbsp of curd into lukewarm milk.If u live in cold place add around 3 tbsp of starter/curd for 1 ltr milk
    Dahi Recipe method
  5. Cover & rest in warm place for atleast 7-8 hours
    Dahi Recipe method
  6. After 8 hours , the milk will be fermented into curd.
    Dahi Recipe method

    Dahi Recipe method
  7. Thick & and malaidar curd is ready. Refrigerate the curd or else it will start turning sour.
    Dahi Recipe method

Serving – Curd can be used in variety of dishes like butter milk (chaas), lassi, raita and many curry recipes.

Hope you liked my recipe. If you did, please do subscribe to my blog for many more wonderful recipes.


Thank you !


Share
Tweet
Pin
Share
No comments
CHICKEN FRY!!!
The name itself makes you drool J Here is a very simple and juicy chicken recipe made with all the basic items available at home.

Chicken Fry/Desi style
Chicken Fry Desi style
Stove to Serve Time: Approx 30 mins

Ingredients

700 gms chicken
1 tbsp Cumin Powder
1tbsp Turmeric Powder
1 tbsp coriander Powder
1 tsp Black pepper powder
3 tbsp Kashmiri Mirch powder
3 tbsp Ginger Garlic paste
2 tbsp Cornflour
1 egg
1 lemon juice
Kasuri methi
Oil
Salt as per taste

Method:

  1.      Brine the chicken with salt and water for atleast 30 mins. Brining will make the chicken tender and juicy/moist. (Optional if pressed for time)2.       Marinate the chicken with lime juice, turmeric powder,chilli powder,ginger garlic paste,pepper powder,cumin powder, coriander powder,egg, little dried kasuri methi and salt as per taste.Mix all these ingredients well with chicken & keep it for marination for atleast 30 mins
    3.       Once chicken is marinated well add cornflour & mix it well.
    4.       Take oil and heat the pan in medium high flame.
    5.       Once the oil is hot. Now put one by one chicken pieces in the pan.
    6.       Cover the lid & fry the chicken in medium flame for 10 mins. Covering the lid will help the chicken to get well cooked from inside.
    7.       After 10 mins open the lid & turn over the chicken to other side.Cook for about 5 mins.
    8.       Once the chicken has turned nice & golden brown off the flame.
    9.       Chicken fry is ready to be relished
    10.   Garnish with onions and lemon wedges


Serving- Serve hot with green chatni or can enjoy it without any dips. 
Serves 4-5 Pax

Watch the YouTube link below for reference
Share
Tweet
Pin
Share
No comments

A simple and very easy to make chilli garlic cheese toast. All you need is a pan, no toaster or oven or microwave needed. No compromise on taste and crunchiness.

Chilli Cheese Garlic Toast | Crunchy | Homemade
chilli cheese garlic toast
Stove to Serve Time: Approx 15 mins

Ingredients
Sliced Bread
Cheese (Cubes/Bar)
10 cloves Garlic
2 green Chilli
2 tbsp Butter

Method:

1    1.   For sauce take butter in a pan. Once butter is melted add finely chopped green chillies and garlic. Sauté them well.
2.       Once garlic turns light brown in colour off the flame and pour the sauce in a bowl
3.       Now in the same pan add little butter & place two slice of bread. We will toast only one side of the bread
4.       Spread chilli garlic sauce evenly on the toasted side of the bread & grate generous amount of cheese
5.       Finally add some butter on hot pan and place this over it(See video for reference)
6.       Cover the lid for about 2 mins, and your chilli garlic cheese toast is ready to be served.


Serving- Serve hot with any dips and enjoy this crunchy and tasty dish at home. 
Watch the YouTube link below for reference: 


Share
Tweet
Pin
Share
No comments
Masoor Dal/Red lentils has the highest amount of protein among all the lentils.
Here I am going to show you how to make quick, easy and very tasty Masoor Dal/whole Red Lentils

Healthy Sabut (Akkha) Masoor Dal / Whole Red Lentils Recipe 

masoor dal

Stove to Serve Time: Approx 25mins.

Ingredients:

1 cup sabut masoor dal/Whole red lentils soaked for around 3 hours
1 ½  tbsp oil
1 medium size chopped  Onion
2 medium size chopped Tomatoes
1 tsp coriander powder
2/3 green chillies
Curry leaves
Whole garam Masala (cardamom, black pepper, cinnamon & bay leaves)
½ inch ginger thinly sliced
3-4 crushed garlic
1 tsp cumin seeds
Coriander leaves
Salt as per taste

Method:

1.       Take some oil in a cooker. Heat in medium flame. Once oil is heated add whole garam masalas, cumin seeds, crushed garlic and chopped ginger, green chilles, few curry leaves and chopped onions. Sauté them well until onion turns golden brown.
2.       Now add chopped tomatoes and coriander powder. Cook for atleast 1 min .
3.       Add soaked masoor dal/Lentils and salt as per taste to the mixture. Stir well
4.       Close the lid of the cooker and cook for atleast 3-4 whistles.
5.       Open the lid once the cooker has released all the steam.
6.       Add water if required .
7.       Before serving, finally add chopped coriander leaves.

Serving- Serve this dish with a squeeze of lime juice and raw onions. Can relish it with rice, paratha, chapati or roti.
Serves 4 Pax.

Watch the video on YouTube:

Share
Tweet
Pin
Share
No comments
Older Posts

About Me

My photo
Sujata Kotian Das
Cooking has been my passion since I was a child. I used to watch my mother cook when I was a small kid which inspired me to become a better cook. I am a food blogger who love to do some experiments in my kitchen mostly with Indian food recipes and share it with the world. Happy Cooking!
View my complete profile

Follow Me

  • facebook
  • instagram
  • pinterest
  • twitter
  • Youtube
  • reddit

Latest YouTube Video

Facebook

The Foodie Curls

recent posts

Blog Archive

FOLLOW ME on Instagram

© The Foodie Curls | Created with by ThemeXpose | Copy Blogger Themes