Powered by Blogger.
  • Home
  • Disclaimer
Facebook Instagram Pinterest Twitter Youtube reddit

The Foodie Curls Indian Recipes

Shakkar para is a crispy, sweet, diamond or rectangular shaped Indian snack is usually made on the festivals of Diwali and Holi. In Maharashtra, this traditional snack is known as shankarpali. It’s worth to make this snack at home because the process is very easy and you just need a few basic ingredients like maida/refined flour, sugar, ghee, milk and oil.
shakkarpare

Shakkar para for some, is a very versatile snack and comes in a savory version too. Popularly known as namak-para or tukdi as it is referred to in some parts of South India.
You can check my Namak para recipe here: Namak Para

This recipe is also available on my YouTube Channel. Please like, subscribe, comment and share if you  liked it there.

Ingredients For Shakkar Pare Recipe

  • 2 cup (250g) maida/refined flour
  • 1/2 cup milk
  • 1/4th cup ghee/clarified butter
  • 1/2 cup (100g) sugar
  • Oil for frying
  • Pinch of salt
  • 1 tsp white sesame seeds (optional)

Method In Making Shakkar Pare Recipe

  1. In a large bowl take 2 cups of Maida, add pinch of salt, sesame seeds and powdered sugar. Mix everything well
  2. Now add melted hot ghee and mix again.
  3. Gradually add milk to the above mixture 
  4. Knead into a smooth dough. Once done, cover it and let it rest for 30 minutes.
  5. Divide dough into three equal parts.
  6. Now grease the rolling pin with ghee and roll the dough. Don’t roll it into very thin sheets, else the pare will become flat and wont become fluffy. For better understanding refer video
  7. With a knife or a pizza cutter, cut them into desired shape.
  8. In a pan heat the oil and fry the shakar paras on low flame until golden brown from both sides and fluffy. It will take around 8-10 minutes.
  9. Cool them completely before storing.
  10. Store in an  airtight container for up to One month.
Note:
  • You can also use cardamom powder instead of white sesame seeds/til.
  • You can substitute all purpose flour (Maida) with whole wheat flour Or even you can use half maida and half wheat atta.
Follow me:
https://www.youtube.com/thefoodiecurls
https://www.instagram.com/thefoodiecurls
https://www.facebook.com/thefoodiecurls
https://www.twitter.com/thefoodiecurls
https://www.pinterest.com/thefoodiecurls
Share
Tweet
Pin
Share
No comments

Cornflakes Chivda | Makai Poha

Try this easy Cornflakes chivda or Makai Chivda as tea time snacks and you are going to fall in love with it. This is crunchy sweet & savory, you can alter the spices as per your preference. Here I have used yellow colour cornflakes which are deep fried to make chivda. These are also called corn poha or makai poha. It can be prepared as Diwali snacks or munching snack for evening tea. Cornflakes namkeen with detailed photo and video recipe. I would also like to highlight my other snack recipes collection from my website.

Aloo Matar tikki : https://thefoodiecurls.blogspot.com/2020/01/aloo-matar-tikki-recipe.html 
Layered Namak Pare : https://thefoodiecurls.blogspot.com/2019/12/layered-namak-paare-recipe.html
Gujiya recipe: https://thefoodiecurls.blogspot.com/2019/11/chasni-gujiya.html


Prep time: 5 mins
Cook time: 25 mins 

1 cup = 250ml

Ingredients

1 cup dried Cornflakes (makai poha) 
1/2 cup Peanuts
1/2 cups Roasted chana dal/ Bengal gram
1/4 cup cashew nuts 
Handful of Kishmish/ golden raisins 
1 tbsp Mustard seeds 
4-5 slit green chilli 
8-10 curry leaves 
1/2 tsp turmeric powder 
1/2 tsp red chilli powder 
1 tsp sugar
Salt as per taste
Oil for frying


You can the complete method short video on my YouTube channel.
Please don't forget to subscribe, like & share

Method of how to make cornflakes chivda

  • Take 1 cup of dried cornflakes, fry it in hot oil.
  • Fry the cornflakes, keep stirring till they expand and become golden crisp.
  • Shake the ladle to remove excess oil. 
  • Drain the corn flakes on a plate/bowl lined with kitchen paper towel. 
  • Fry the rest of the corn flakes in the same way.
  • Add peanuts, fry them in the same way until they are crisp and crunchy 
  • Remove and place them in kitchen towel 
  • Similarly fry roasted chana dal and cashews until they turn brown. Drain excess oil in kitchen towel. 
  • Next add the raisins, fry them till they become plump & swell up.
  • For tadka, heat 1 tbsp oil, add mustard seeds, curry leaves, slit chilli, chilli powder, sugar and salt. 
  • Mix well
  • Add it to the fried mixture, gently mix everything well.
  • Once the chivda is cooled down Store it in an airtight container 
  • Serve fresh as a tea time snack 
Thank you!

Follow me on Social Space:-
Facebook | Instagram | Pinterest | Twitter

Share
Tweet
Pin
Share
No comments

Chashni wali gujiya | chasni gujiya | mawa gujiya

gujiya karanji

Gujiya is one of the most popular and special sweet made especially during holi and Diwali festivals. It is also known as Karanji in Maharashtra. It is made with different stuffings too and each stuffings has its own purpose and rationale. This recipe is dedicated to mawa or khoya stuffing dipped in sugar syrup known as chashni wali gujiya recipe.You will surely savor this homemade gujiya than that brought from the market. These gujiyas can be stored for up to 15 to 20 days.Here I have Explained the authentic way to make the best soft gujiya or karanji with all the tips and tricks, I hope you all will like it. 

Prep time: 15mins
Cook time: 30mins
Yields: 17-18 gujiya’s

Ingredients:

1tbsp crushed almond,cashew and raisins each
1/2 cup grated dry coconut/desiccated coconut
100 gms Mawa/Khoya
3/4 cup powdered sugar
1 tsp Cardamom powder
2 cup all purpose flour/Maida (250gms)
1/4 cup ghee (4tbsp)
1 cup sugar (for Chashni)
Pinch of salt


You can also watch this recipe on my YouTube channel in Hindi

Please hit the like & Subscribe button if you liked it there.

Method How to make Mawa stuffed gujiya

  • Firstly Knead semi-stiff dough by adding 4 tbsp of melted ghee and a pinch of salt in refined flour and mix them really well. Add water in small portions and knead semi-stiff dough. For this much dough half cup of water is used. Cover the dough with moist cloth and keep aside for 15 to 20 minutes to set. 
  • Meanwhile in a Kadhai or heavy bottom pan heat 1 tsp ghee. Roast all the nuts along with dry coconut until it turns lightly brown. Transfer it in a bowl and in the same pan add Crumbled mawa and roast it on medium flame while stirring constantly until there is slight change in the color and it turns fragrant. Transfer the roasted mawa in a separate wide plate and let the mawa cool down a little.
  • Until Mawa is cooling Prepare Sugar Syrup. Take 1 cup of sugar in a vessel and add 3/4 cup of water. Cook until sugar dissolves completely. Keep stirring the syrup at regular intervals. When the sugar dissolves completely let it cook for another 3 minutes.
  • Check the Syrup by taking some syrup in a spoon. After it cools down, take it between your finger and thumb. It should be gooey like honey. There is no need to look out for thread in the syrup. Sugar syrup is ready, take it off from flame.
  • For the stuffing, when the mawa is cooled down completely, add roasted chopped cashews, almonds, raisins, cardamom powder and powdered sugar to it. Mix everything really well. 
  • Next let’s start rolling and stuffing gujiyas Knead the dough again and make small lumps/balls from it. Keep the dough balls covered with moist cloth to prevent them from drying. After this, take one dough ball and roll it evenly into round shape. I have used a katori/bowl to cut the edges and also it gives an even size to all the gujiyas. Make sure the edges are not thick. Press it with your hand if needed.
  • Now take poori in your hand and place some stuffing over it. Apply some water on the edges and fold into half. Stick the edges really well. Now start pinching and twisting/folding the gujiya. For this, pinch the edges of gujiya from other hand and give a fold with the hand you are holding it. Again pinch at some distance and fold the forth portion. Likewise fold the entire edge of the gujiya. Place this gujiya over a cloth and cover it. Similarly prepare remaining gujiyas as well.
  • Finally let’s fry the gujiya’s. Take enough ghee/oil in a wok. Heat it on medium flame. When the oil is sufficiently hot reduce the flame to medium-low and drop the gujiyas in to ghee/oil one by one. When the gujiyas float on the surface, flip the sides and continue frying until they turn golden brown in color.Drain the excess oil and dip the gujiyas in sugar syrup and let them remain drenched for 5mins. Till then fry the rest of the gujiya. After 5 minutes, take out the gujiyas from the sugar syrup one by one and drench the remaining gujiyas as well. Coat each gujiya with sugar syrup and keep them on a strainer/mesh so that excess syrup drains off.
  • Sugar coated and sugar filled super scrumptious mawa gujiya is ready. Store them in any air tight container and relish eating for up to  15 to 20 days.

Tips/Notes

  • Knead little stiff dough, it should not be soft.
  • Don’t mix sugar when the mawa is hot else it will melt.
  • You can adjust the quantity and choice of dry fruits as desired. 
  • Fry the gujiyas on low flame. After 5 to 6 minutes if you notice that the flame is too low or the temperature has dropped then increase the flame a little.
  • Keep the sugar syrup covered to prevent it from cooling down quickly.

I hope you enjoy cooking this delicious recipe as much as you enjoyed reading it. If you tried, then please let me know in the comment section below. 
Subscribe to my blog for more such recipes.
Thank you!
Share
Tweet
Pin
Share
1 comments

Blueberry Chocolate

Blueberry chocolate

Hi guys, I'm back with another chocolate recipe. I somehow could not take my mind off chocolates of late and the best ones are those which have those amazing fillings in them. Here I have infused these dark chocolate delights with blueberry sauce. Dark chocolate and blueberries are a natural combination. The tangy, sweet tart blueberry sauce and the slightly bitter dark chocolate go so well together.
I always make homemade blueberry sauce. It’s so super easy, there’s really no reason not to. With the blueberry sauce leftover, I usually use it as a topping on bread or in any desserts

Make these for your holiday get together, birthday, anniversary and I promise you and your guests won’t be disappointed. For more dessert options, check out my No oven Eggless Chocolate cake and 3 ingredients Biscuit cake


Preparation time: 20 mins
Cook time: 15 mins
Total time: 35 mins
Yields: 20-22 Chocolates


Ingredients

250gms Dark compound Chocolate/semi dark chocolate
100 grms Blueberries
2 tbsp Sugar
1/2 tsp Cornflour
1/2 cup water
Nutmeg powder(optional)


You can also watch the making of this recipe on my YouTube Channel in Hindi:
Your comments and feedback's are most welcome. Please support me by subscribing to my channel.

Method

Blueberry Sauce

  • In a pan add blueberries, sugar and water. Mix well in medium flame.
    blueberry
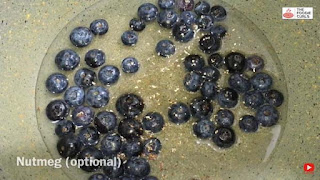
  • Add nutmeg powder (optional) to get a nice flavour
    blueberry
  • Cook for 5 mins you will notice the blueberries will start oozing out its colour
    blueberry sauce
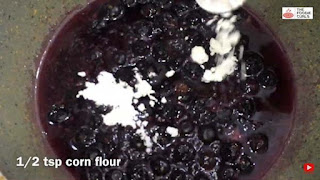
  • At this stage add 1/2 tsp Cornflour so as to thicken up the solution
    blueberry thickner
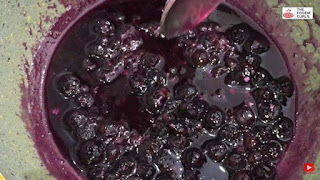
  • Mix well and cook for 10 mins or until it forms a syrup like consistency
    blueberry sauce
  • Switch off the flame and let it cool for 10 mins
  • After 10 mins you will notice the syrup will turns more thicker
  • You can store this sauce in a airtight jar for about 15-20 days

Chocolate

  • Now let’s start preparing chocolate. Cut the chocolate bar into pieces and place it in a thick bottom glass or metal bowl.
  • With a double boiler, bring some water to a simmer in a pot and then fit the glass or metal bowl over the top of the pot. The steam from the simmering water will heat the chocolates in the bowl.
    pot
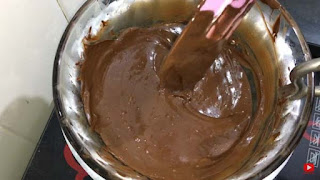
  • Switch off the flame once the chocolate is completely melted and turns smooth and shiny
    melted chocolate

Blueberry Chocolate

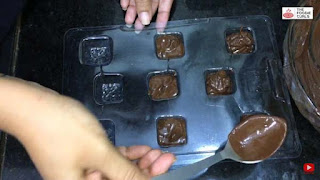
  • Now pour the mixture in a mold. Pour a spoonful into each spot. Tap the mold firmly on the table to release any air bubbles in the chocolate.
    chocolate mold
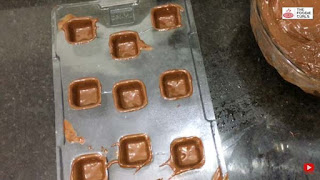
  • Invert the mold on the bowl and tap it until it forms the outer layer/crust of the chocolate (watch video for process)
    chocolate mold
  • Place it in the fridge for 10 mins till they become little hard. Until then repeat the same process with other mold
    chocolate mold
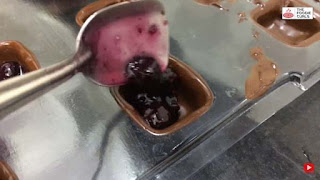
  • Take out the mold from the fridge and pour in 1/2 tsp of prepared blueberry sauce in each spot of the mold. Just ensure not to overfill it.
    blueberry filling
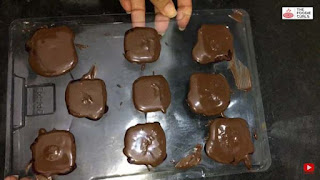
  • Pour a little more melted chocolate over the top of each spot in the mold to seal it and tap again to smooth out the chocolate
    chocolate
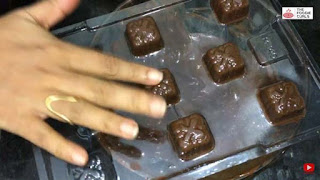
  • Set the chocolates in the fridge to firm up the chocolate. 
    chocolate mold

    chocolate mold
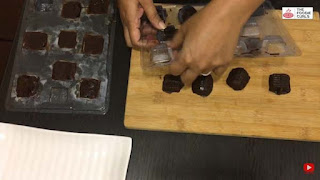
  • When the chocolate is completely set, release it from the mold by pressing upwards on the bottom of each mold.
    chocolate

    chocolate
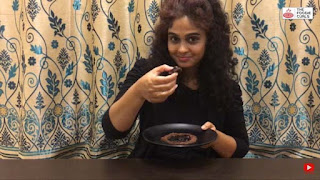
  • Take the pieces out and munch away!
    Sujata Kotian

Note/Tips

  • Try to use a deeper mold, it will be easy to fill in the sauce and will also fetch good results
  • You can use any chocolate (dark, milk etc) of your choice
  • If blueberry is not readily available you can use any berries or nuts (like almond or peanuts) of your choice
  • It took 5 hours for me to set the chocolate. It may vary accordingly.
  • Total time does not include cooling time for the chocolates.
Hope you liked my recipe. If you did, please do subscribe to my blog for many more wonderful recipes.

Love, Sujata
Share
Tweet
Pin
Share
No comments

Gurudwara style Kada Prasad

kada prasad

Kada Prasad or Atte Ka Halwa is smooth, soft and velvety sweet/dessert made with whole wheat flour. Best is to use freshly ground flour that is grainy and coarse. The coarse flour gives it a better texture and mouth feel. It is one of the delicacies which are served in Gurudwara (a worship place for Sikhs or Guru ka darbar) as Prasad. If you have visited any Gurudwara then you will vouch for the awesome taste, this prashad is served with lot of devotion and continuous chanting of hymns so the taste of Prasad is divine and has a different energy to it. Karah Prasad is made with equal parts of 3 ingredients whole wheat flour, ghee & sugar.This is the most simple and easy halwa recipe.
Follow few tricks to a smooth and creamy textured halwa.


                                    This recipe is also available on my YouTube channel:
Please don't forget to like and subscribe my YouTube channel.

Preparation time: 10 mins
Cook time: 20-25mins
Servings: 14-15 Pax

Ingredients for kada prasad

1 1/2 cup whole wheat flour
1 1/2 cup ghee
1 1/2 cup Sugar
2 cup water (approx)

Method

  • In a pan combine sugar and water. Mix until sugar is completely dissolved
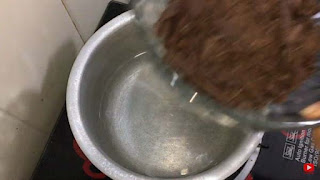
  • Melt ghee in another heavy bottom pan/kadai, to this add wheat flour and keep stirring it in low flame
  • Keep stirring the wheat flour until the colour changes to dark brown for about 12-14 mins.
  • At this stage mix the sugar water slowly to avoid any lump formation (be careful while pouring water, keep the flame low)
  • Keep stirring, initially the halwa will be in liquid state but gradually it will start to thicken.
  • Cook till halwa starts releasing ghee and you will also notice it will not stick to the kadai/pan
  • Serve hot or warm and enjoy!

Notes/Tips:

  • You can garnish the halwa with nuts or can also add cardamom powder
  • Roast the wheat flour on low to medium flame to prevent from burning.
  • Additionally, to get nice texture use coarsely ground wheat flour, however fine atta also works great.

I hope you enjoy cooking this delicious recipe as much as you enjoyed reading it. If you tried, then please let me know in the comment section below. 

Subscribe to my blog for more such recipes.
Thank you!
Sujata

--
Other sweet dish which you may like > Moong Dal Peda
Share
Tweet
Pin
Share
No comments
Older Posts

About Me

My photo
Sujata Kotian Das
Cooking has been my passion since I was a child. I used to watch my mother cook when I was a small kid which inspired me to become a better cook. I am a food blogger who love to do some experiments in my kitchen mostly with Indian food recipes and share it with the world. Happy Cooking!
View my complete profile

Follow Me

  • facebook
  • instagram
  • pinterest
  • twitter
  • Youtube
  • reddit

Latest YouTube Video

Facebook

The Foodie Curls

recent posts

Blog Archive

FOLLOW ME on Instagram

© The Foodie Curls | Created with by ThemeXpose | Copy Blogger Themes